Introduction
The goal of this tutorial is to create a plugin that extends Nomad PIM.
Functionality will not be implemented in this tutorial yet, it just provides
the base for the following tutorials.
If there are problems with the tutorial, feel free to ask in the
Developer Mailing List.
Preconditions
This tutorial requires an Eclipse configuration that is set up according to the tutorial "Setting up Eclipse for Nomad PIM development".
Tutorial project access
The project that is the result of the tutorial is available in the subversion repository:
| newPlugin tutorial project | The project created in this tutorial |
| tutorial/newPlugin/trunk |
Create a new plugin project
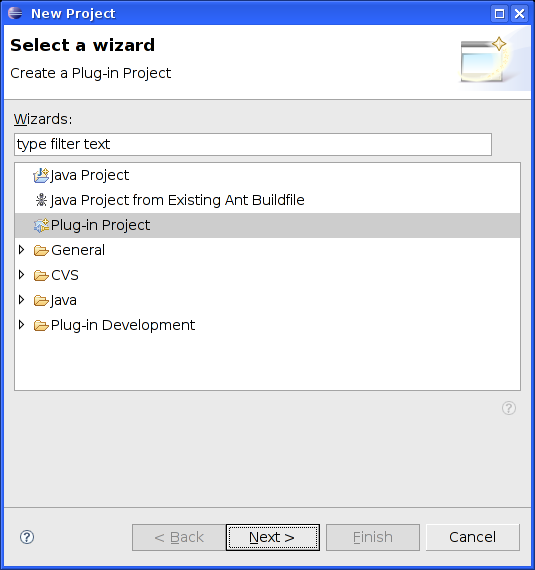
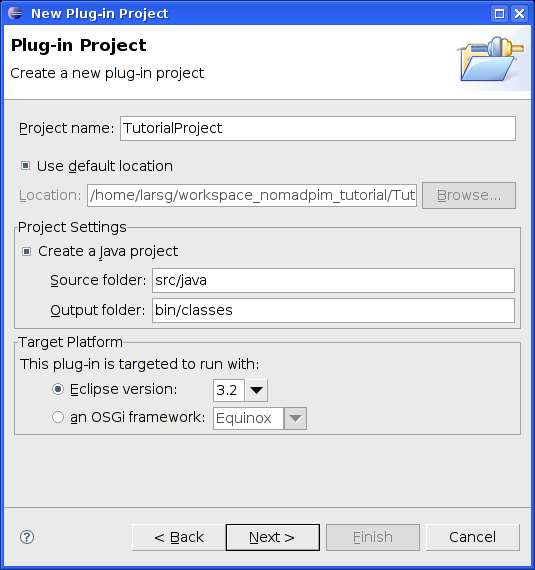
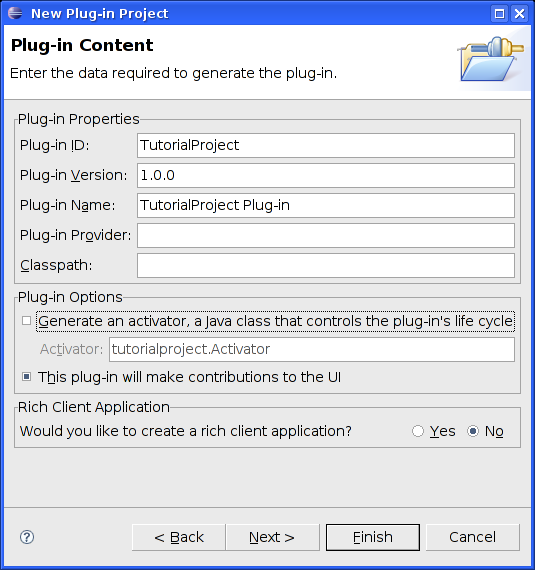
Create a new "Plug-in Project" using the "File >> New >> Project" Dialog in Eclipse as described in the following screenshots:
 |
 |
 |
 |
Configuring the plugin dependencies
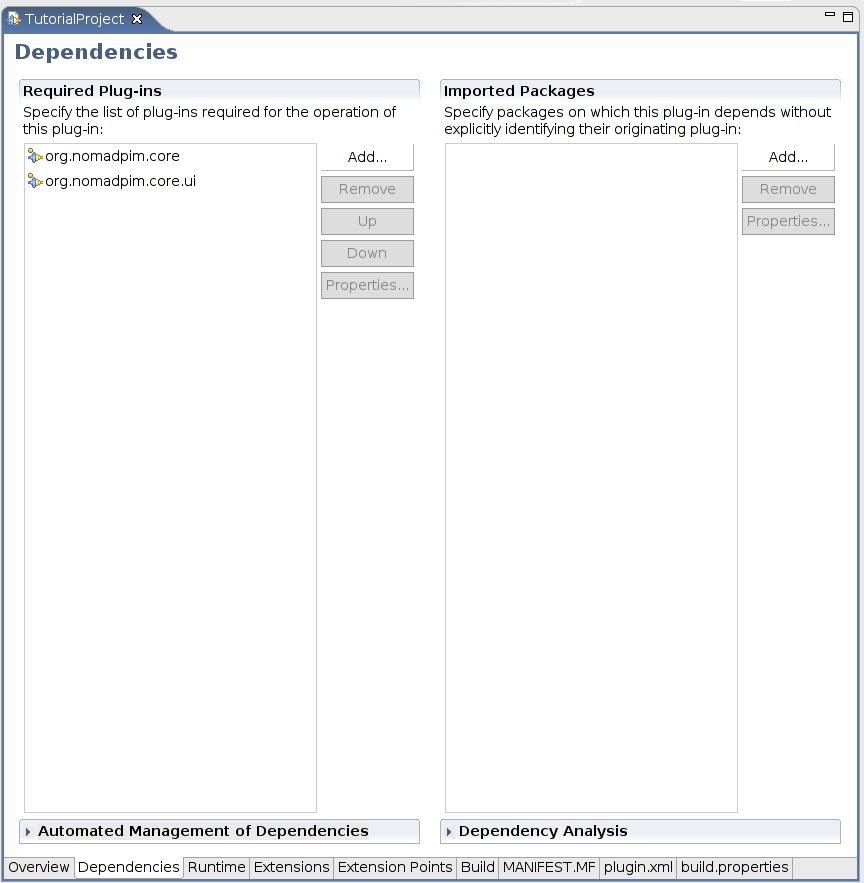
Open the file "META-INF/MANIFEST.MF" and select the "Dependencies" tab. Add the "org.nomadpim.core" and "org.nomadpim.core.ui" plugins as required plugins. The result should look like this:
 |
Create the required folders
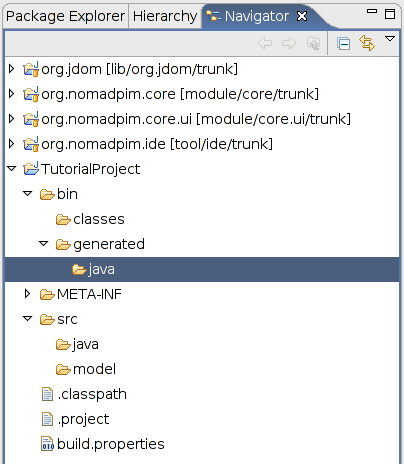
The next step is to create the missing directories required for code generation. Open the "Navigator" view and create the folder "bin/generated/java" and "src/model". Afterwards, your "Navigator" view should look like this:
 |
Configure the build path
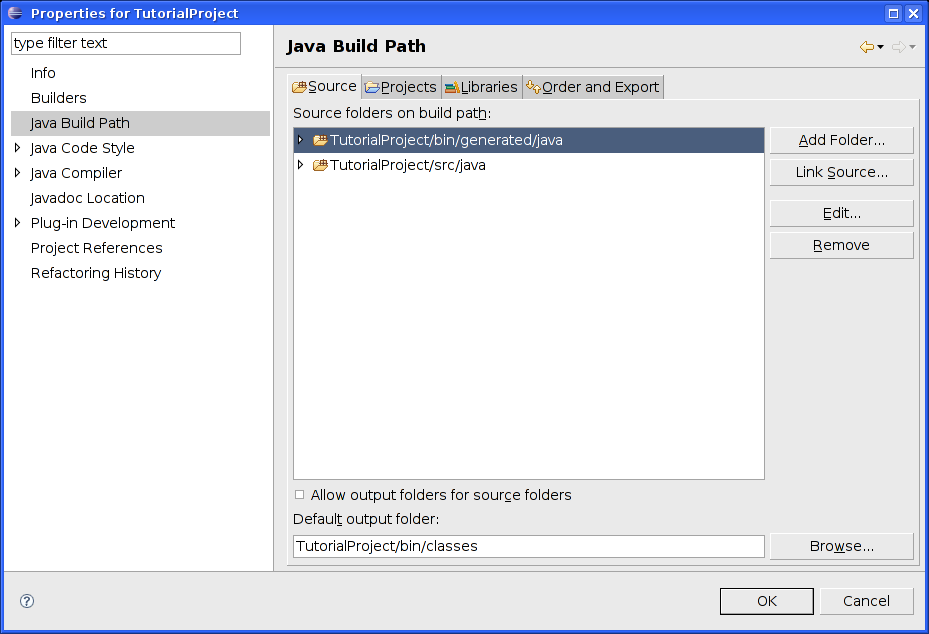
The generated sources will be generated to a seperate source folder. This folder must be added to the project source folders by "Project Properties >> Java Build Path >> Source >> Add Folder". After adding it to the build path, the dialog should look like this screenshot:
 |
Create the required basic model files
Some model files are required as input for the code generator.
Create a plugin.xml file in the folder "src/model" with the following content:
<?xml version="1.0" encoding="UTF-8"?>
<?eclipse version="3.0"?>
<plugin>
</plugin>
Create an Entities.xml file in the folder "src/model" with the following content:
<entities
  xmlns:ui="http://nomadpim.org/xsd/ui"
  xmlns:persistence="http://nomadpim.org/xsd/persistence">
</entities>
Create a Patterns.xml file in the folder "src/model" with the following content:
<patterns>
</patterns>
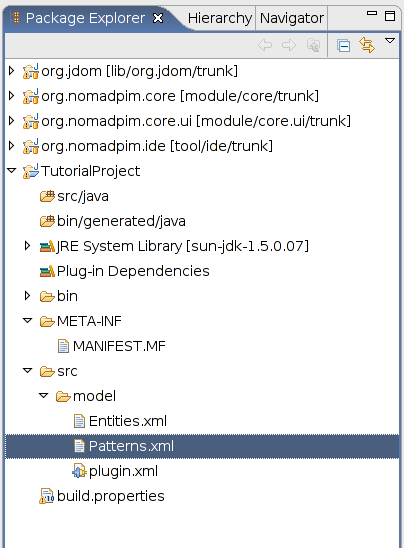
By now, your "Package Explorer" view should look like this:
 |
Configure the automatic ant builder to generate code
Add the builder by "Project Properties >> Builders >> New >> Ant Build" and configure it as described in the following screenshots:
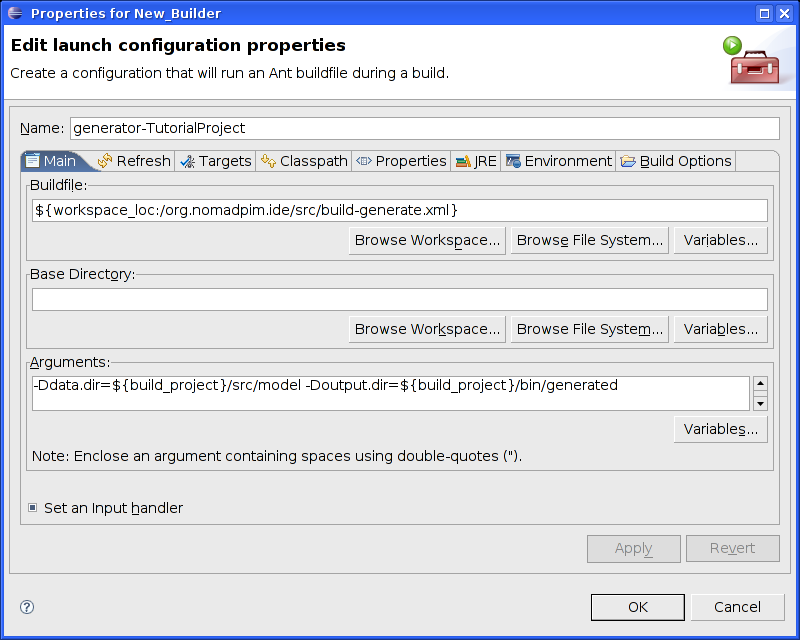 |
        ${workspace_loc:/org.nomadpim.ide/src/build-generate.xml}
        -Ddata.dir="${build_project}/src/model" -Doutput.dir="${build_project}/bin/generated"
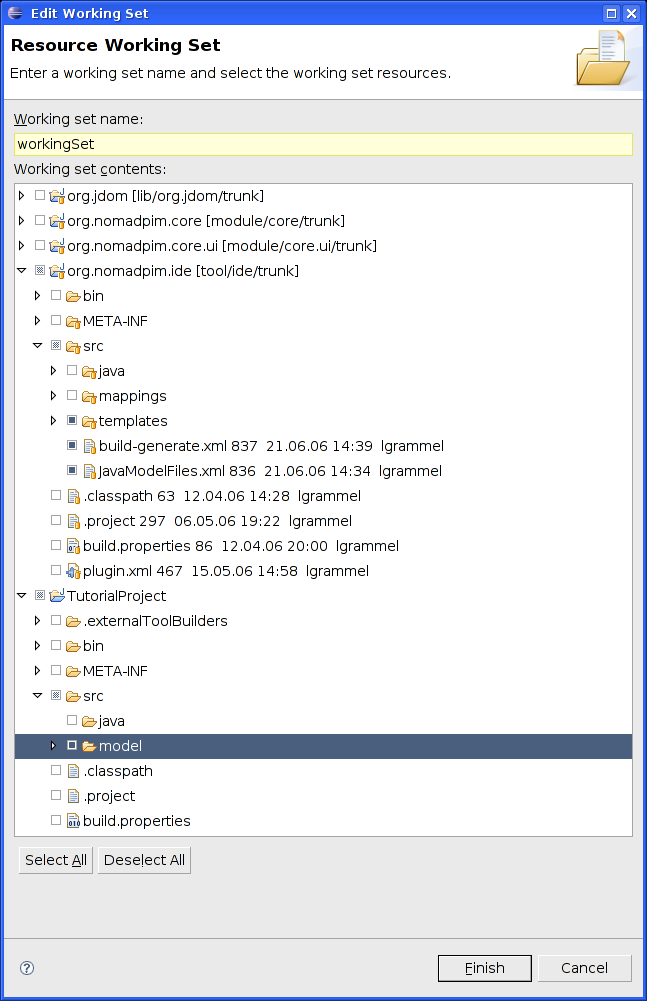
Select "Builder Options >> Specify working set of relevant resources" and configure it as shown
in the next screenshot:
 |
 |
The next step is to get the builder running automatically. Open the file ".externalToolBuilders/generator-TutorialProject.launch" using the "Navigator" view and change
<stringAttribute key="org.eclipse.ui.externaltools.ATTR_RUN_BUILD_KINDS" value="full,incremental,"/>
to
<stringAttribute key="org.eclipse.ui.externaltools.ATTR_RUN_BUILD_KINDS" value="full,incremental,auto,clean"/>
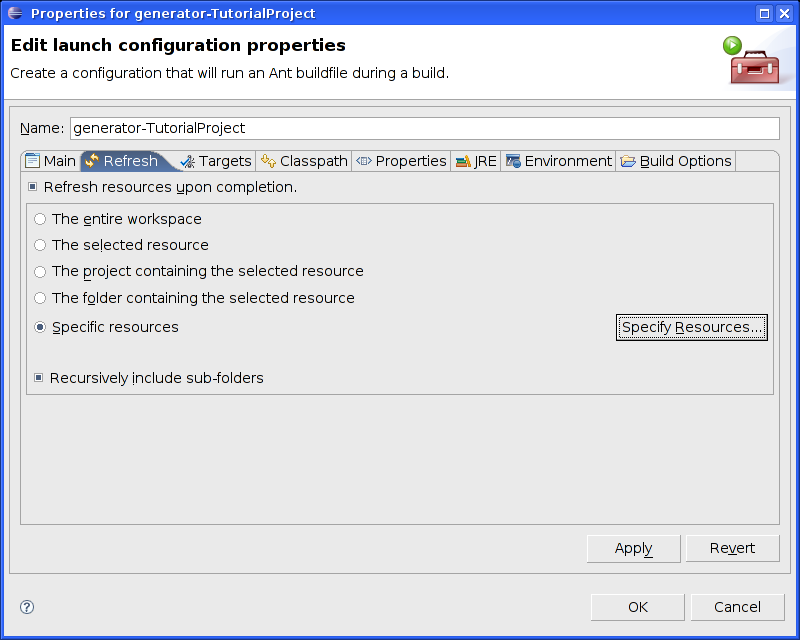
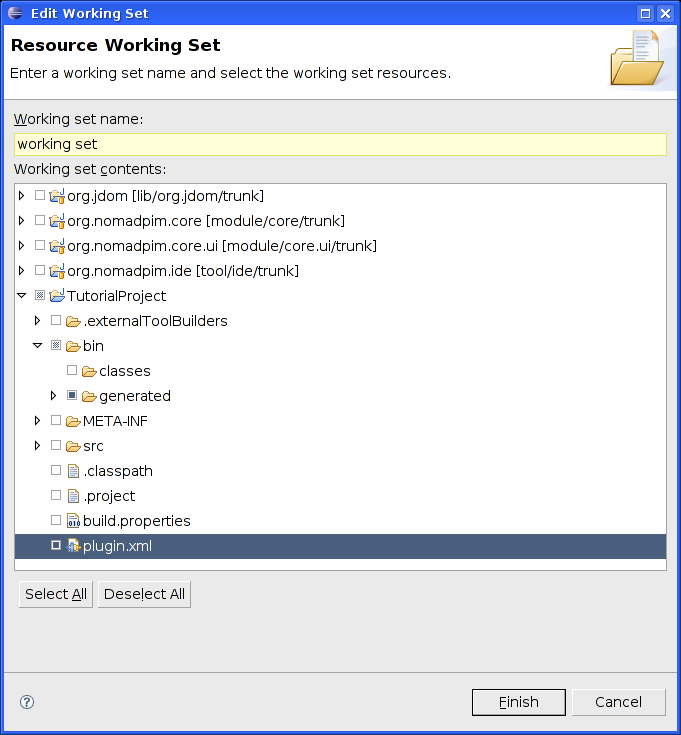
The last step is to configure the resource refreshing. Open "Project Properties >> Builders" and edit the "generator-TutorialProject" builder. Select the "Refresh" tab in the "Edit launch configuration properties" dialog and configure it as described in the next two screenshots:
 |
 |
Congratulations!
You just completed this tutorial. The next tutorial is about creating an entity type.